Austin Hardware’s Front Drawer Release Systems
Our front drawer release systems include the original, patented Front Drawer Release (FDR), Drawer Release Pro (DRP), and Drawer Release Lite (DRL). They can all be used in conjunction with the Austin Hardware lock-in, lock-out 7650 series drawer slides.
Drawer Release Pro (DRP)
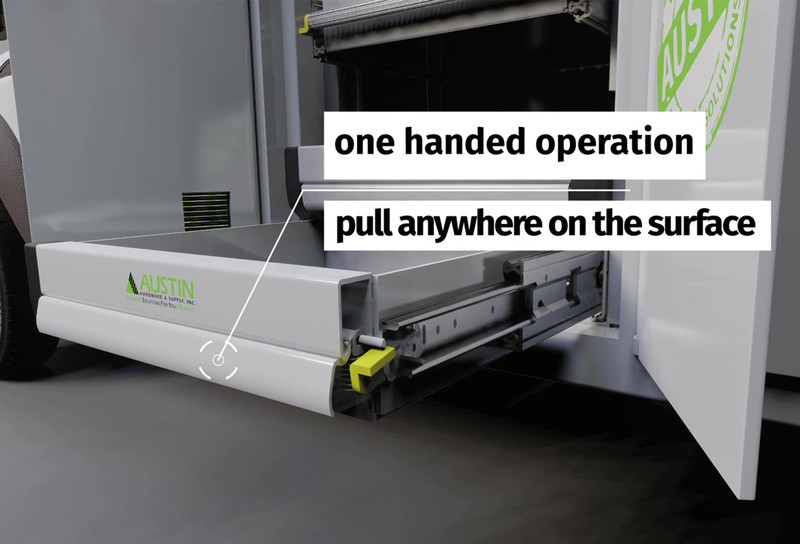
Designed to give the user a convenient one-handed operation similar to our Front Drawer Release (FDR) system. One kit, and you’re all set. This is the cost-effective, functional drawer release option you’ve been looking for.
- Quick Installation
- Bolt-On
- Zinc Plated Steel Fasteners
- Extruded Aluminum Handle
- One-Handed Actuation
Drawer Release Lite (DRL)
This is the cost-effective, functional drawer release option that gives you everything you need in one kit for applications where two-handed operation is acceptable.
- Bolt-On
- 1/4-20 Stainless Steel Hex Head Cap Screw
- 1/4-20 Standard Zinc Plated Steel Nyloc Nut
- Extruded Aluminum Handle
- Only available up to 36"
Front Drawer Release Accessories
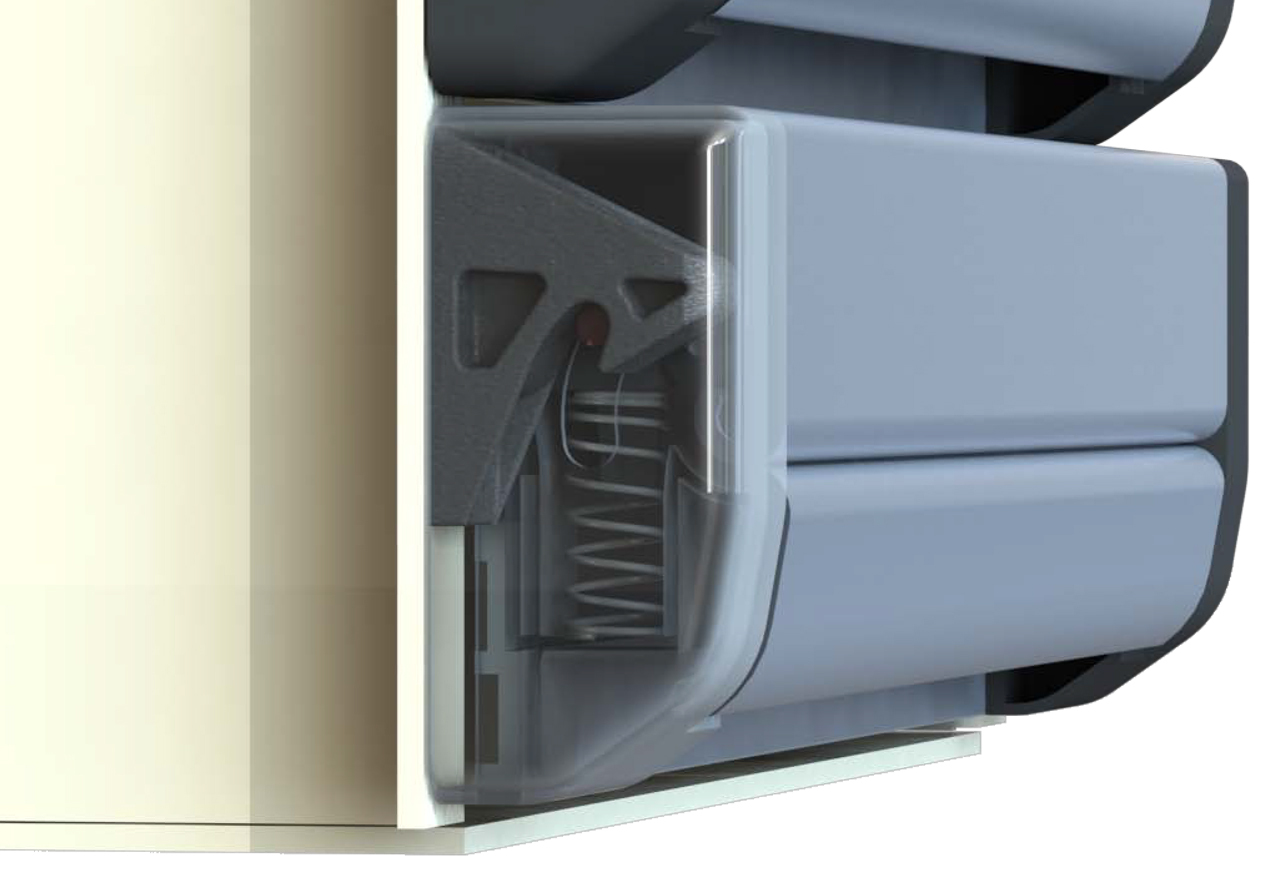
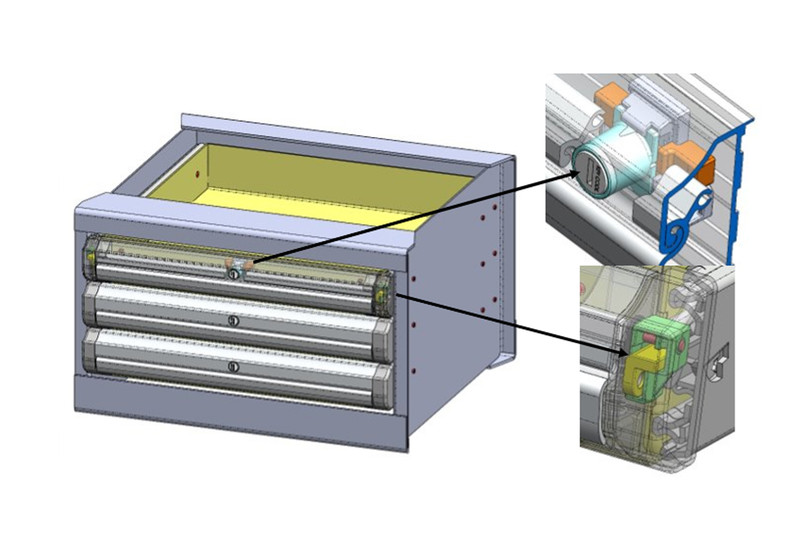
FDR Hooks
Used for "Lock-In Only" applications, the hooks allow the FDR to slam closed and then hold it closed. This arrangement can allow the use of standard nonlocking drawer slides.
(Note: This requires a different FDR length calculation than the standard shown above).
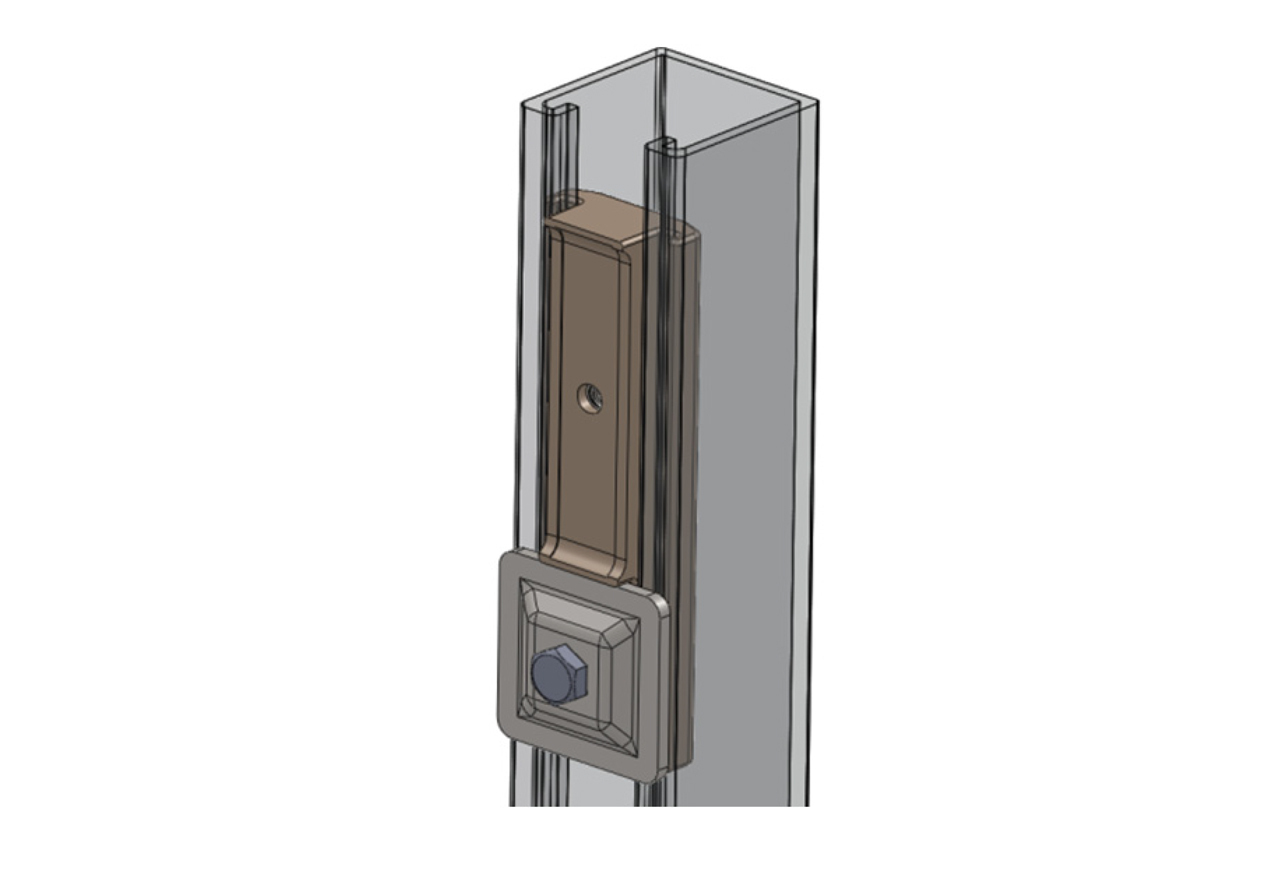
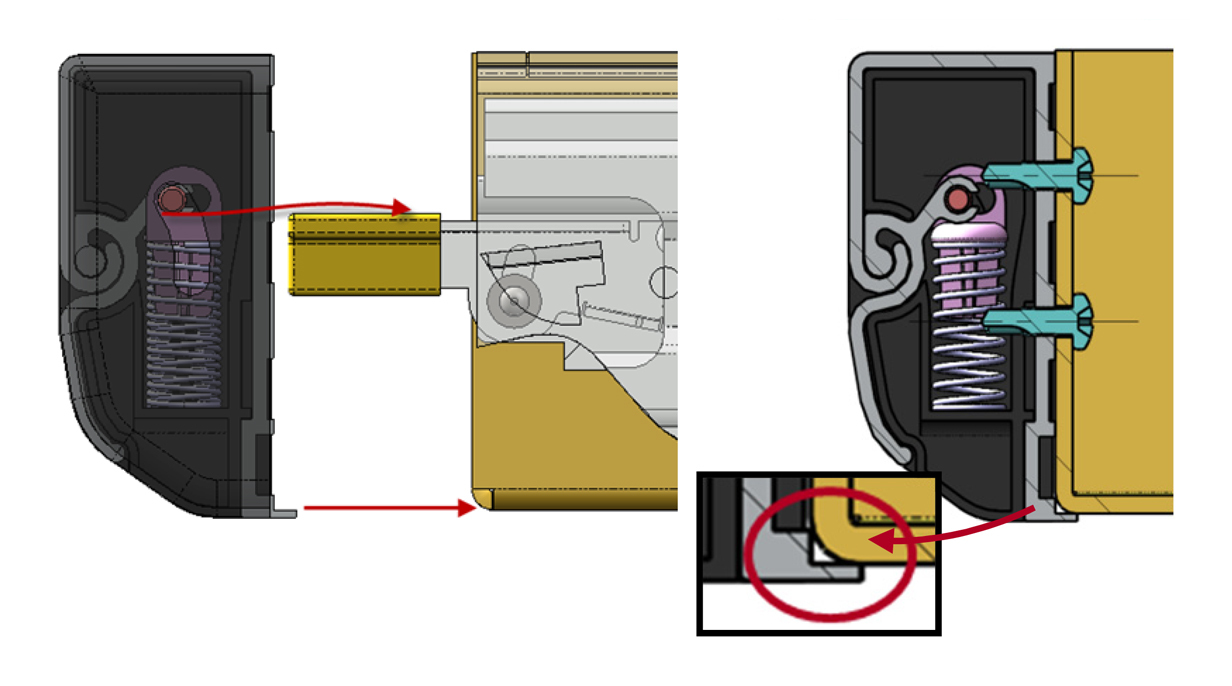
Strut Nut Assembly
Drawer slides mount to the Strut Nut Assembly, which slides into the strut channel. A screw at the bottom allows easy adjustment and clamping of the strut nut assembly at any position in the channel.
Contact our sales team for technical assistance with any application development needs.
Shop front drawer release systems
How to Install The Front Drawer release systems
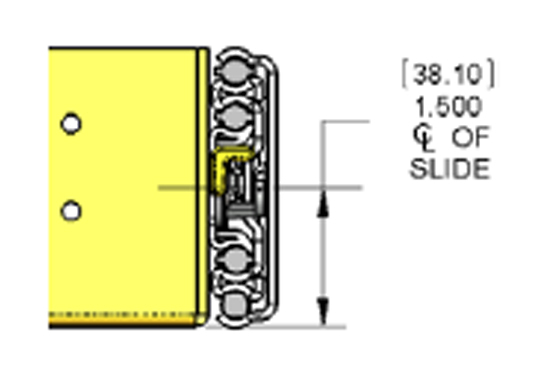
Step 1
The centerline of the 7650 slides must be mounted 1.50” above the bottom of the drawer. This ensures that the trigger is properly located when the FDR is mounted.
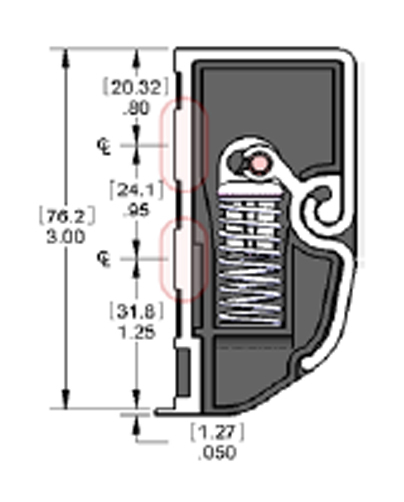
Step 2
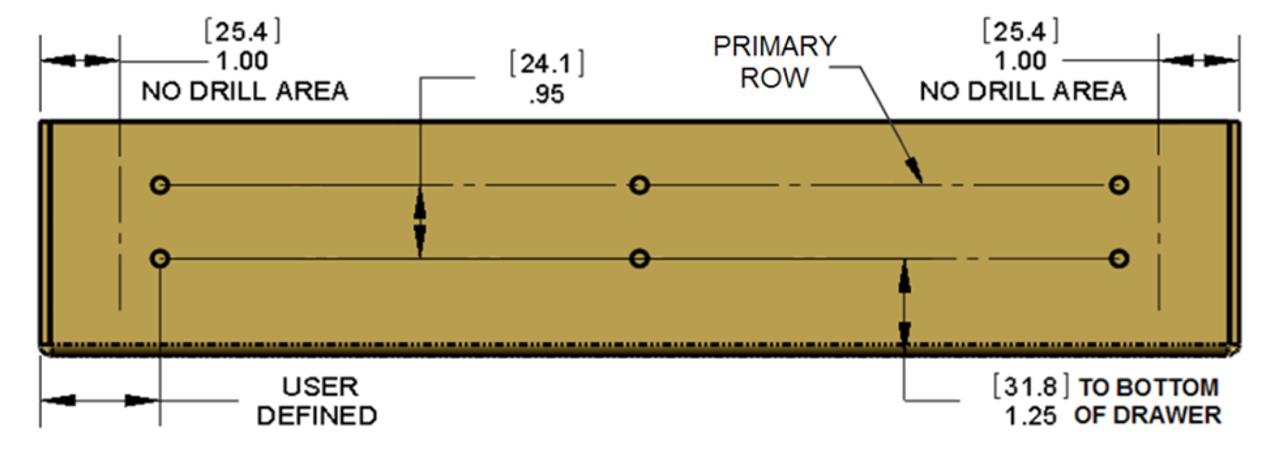
The fasteners will be located on the thick ribs on the back surface of the extrusion. The lower rib is 1.25” above the bottom of the drawer, and the upper rib is .95” above the lower rib.
Step 3
Pre-punching holes (or horizontal slots) in the front wall of the drawer is not required, but doing so will make installation easier and faster. Typically, drawers 30” wide or less only need four (4) fasteners. Wider drawers may require more fasteners in the middle (determined at the discretion of the installer).
Step 4
Austin Hardware supplies a wide variety of fasteners that will work to secure the FDR to your drawer:
- TEK Screws: A #8 or #10 x 5/8 self-drilling screws eliminate the need to pre-drill holes in the FDR ribs prior to mounting.
- Pop Rivets: A 3/16” aluminum rivet is ideal in pre-drilled holes.
- Machine Screws: #10 or 1/4” screws can be used if the drawer has clearance holes and the FDR ribs holes are drilled and tapped.
Step 5
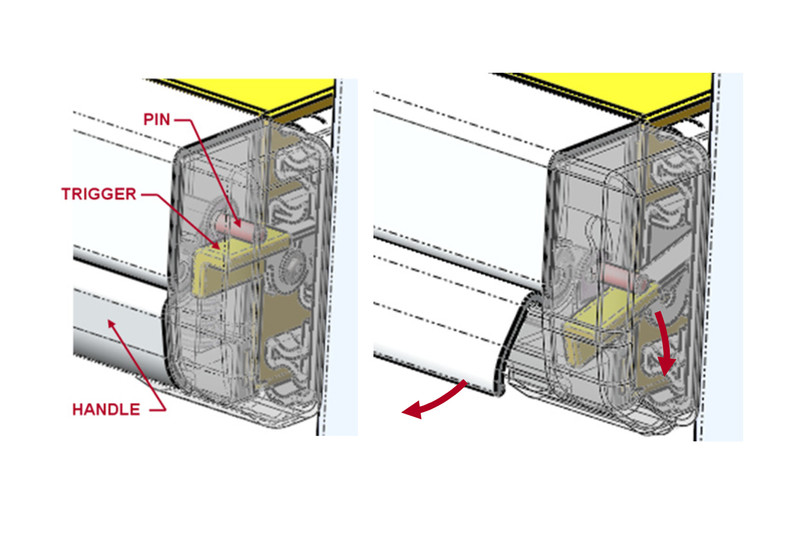
1. Slide the pins of the FDR over the top of the triggers on the drawer slides.
2. As the FDR contacts the drawer face, locate the lower lip of the FDR against the bottom front corner of the drawer
3. Press/hold the back of the extrusion against the front of the drawer and secure the FDR to the drawer with your fastener of choice.